How Castapod Can Elevate Your Business

The Benefits of Podcasting for Businesses

Podcasting has emerged as a compelling avenue for businesses to connect with their target audience. One of the biggest benefits is said to be brand awareness. It allows businesses to reach a diverse audience, as podcasts can be easily downloaded and shared.

Regularly sharing your insights, trends and your expertise within your community helps people develop trust in you. They will come to like you. If people like you, and you offer a product or service that they are in need of, they will consider buying from you.

Podcasting also helps build traffic, leads and sales. It can help improve your SEO. Having a wide variety of content is seen as beneficial. It’s also a cost-effective marketing tool that has a relatively low investment.

Why Podcasting is More Accessible Than Ever

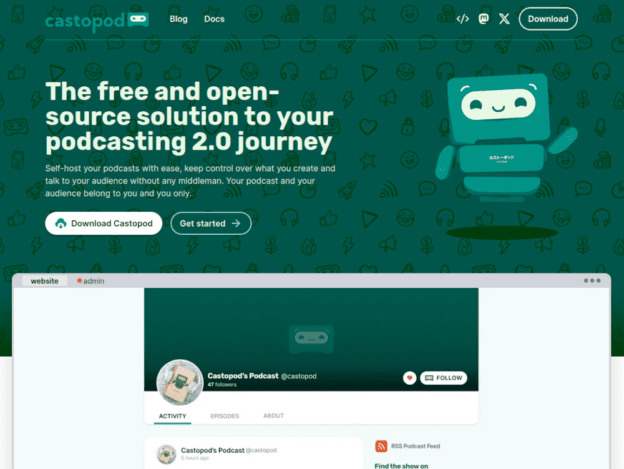
The cost of podcasting equipment, once seen as a barrier, has decreased remarkably. Today, businesses can acquire decent microphones, headphones, and recording devices at affordable prices, enabling them to deliver professional-sounding podcasts.

Moreover, user-friendly recording software has revolutionized the process of creating podcasts. Platforms such as Audacity, GarageBand, and numerous other applications have simplified the recording and editing process, making it possible for individuals with limited technical skills to produce compelling audio content.

Services like Castapod provide a straightforward means for businesses to host their podcasts and reach a global audience without overwhelming technical demands.

Introducing Castapod: The Open Source Podcasting Solution

Castapod emerges as a powerful open-source platform designed explicitly for podcasting, catering to the evolving needs of businesses looking to harness audio content effectively. One of the most appealing features of Castapod is its customizable options, allowing users to tailor the podcasting experience to align with their brand identity and audience preferences.

Seamless integration with existing websites is another compelling advantage of Castapod. This is easily achieved if you’ve decided to host your website on a Cpanel account with Hostgator. It is one of the Softaculous scripts you can install on your site with a click of a button. No programming required.

You can learn how it works by visiting the developer’s site. Some of the information isn’t applicable if you’re installing the program from your Hostgator Cpanel account. You can ignore all the installation information.

It’s understandable that this isn’t a marketing solution that’s applicable to everyone. But for those who are able to take advantage if this tool, it will serve you well.


WordPress Threat Security Intelligence

Fourteen years ago, a WordPress site of mine was attacked. The URLs on the website were pointing to pages offsite that were full of spam. I was looking through all of my articles, both pages and posts, and couldn’t find any problem. This is when I leaned about Google Webmaster Tools. It’s been rebranded in recent years as Google Search Console. Still, it has information to help you deal with this kind of attack.

Wordfence is a plugin I’ve been using since the attack. Nothing has breached my sites since then. It’s the first plugin I install, when I put up a new WordPress website.

In their newsletter, I received this morning, they say:

Over the past week, there were 104 vulnerabilities disclosed in 103 WordPress Plugins and no WordPress Themes that have been added to the Wordfence Intelligence Vulnerability Database by the Wordfence Threat Intelligence Team.

The team also deployed 1 new firewall rule that provides Wordfence Premium, Wordfence Care, and Wordfence Response customers with enhanced vulnerability protection. Wordfence free users will receive this protection after a 30 day delay.

Our mission with Wordfence Intelligence is to make valuable vulnerability information easily accessible to everyone, like the WordPress community, so individuals and organizations alike can utilize that data to make the internet more secure. That is why the Wordfence Intelligence User Interface, Vulnerability API, Webhook Integration, and Wordfence CLI Vulnerability Scanner are all completely free to access and utilize both personally and commercially, and why we are running this weekly vulnerability report.

Enterprises, Hosting Providers, and even Individuals can use the Wordfence CLI Vulnerability Scanner to run regular vulnerability scans across the sites they protect. Or alternatively, utilize the Vulnerability Database API to receive a complete dump of our database of over 20,000 vulnerabilities and then utilize the Webhook Integration to stay on top of the newest vulnerabilities added in real-time, as well as any updates made to the database, all for free.

You can install the Wordfence plugin by clicking on plugins in your sidebar and install new. Type in Wordfence. Besides Wordfence, you’ll also see Wordfence Assistant. It’s a good idea to install it as well. If you get locked out of your site, it will help you get back in by sending an email to the administrator, which would be you if it’s your WordPress.

Easy! Appointments: A Guide to Simplifying Your Appointment Scheduling

Easy! Appointments is a fantastic tool if you’re operating a business, and you need to have your clientele book appointments with you. It’s very easy to add to your website if you’re hosted with Hostgator on an account that includes the Cpanel. Softaculous is included in your plan and using it there are a lot of various programs and scripts you can launch with one click of a button.

Softaculous is described as:

Softaculous is an auto installer for 380+ apps like WordPress, Joomla, Drupal, Magento, etc. which integrates with several control panels like Webuzo, cPanel, Directadmin, Plesk, Interworx, ispmanager and more.

Softaculous has features like Auto Upgrade, Cloning, Staging, Remote Import, Backups, Restore and more which helps you in maintaining your apps with ease.

Try the demo

I already have a Google Calendar, and using the demo on my Hostgator hosting account, I didn’t have to give Easy! Appointments any information about it. It just automatically synced. Using the Thunderbird Email client, the calendar automatically synced with it as well, so I didn’t have to go online to see my new appointments.

Getting Started

  1. Once you have your Hostgator account setup, you login to your Cpanel, click the tab to Softaculous and you will see Easy! Appointments under Files. Click the button to instrall the program and you’re all set.

  2. Initial Setup: Once installed, you’ll need to configure the basic settings, such as your business name, email address, and time zone. You can also customize the appearance of your booking page to match your website’s branding.

Key Features

  • Appointment Scheduling: Customers can easily book appointments online by selecting available slots in your calendar. You can set specific working hours, break times, and booking intervals to control availability.
  • Multiple Services: Define different services you offer, each with its own duration and price. This allows you to manage various types of appointments.
  • Multiple Providers: If you have a team, you can create profiles for each provider and assign appointments to them.
  • Google Calendar Sync: Easily sync your appointments with Google Calendar for seamless integration with your existing workflow.
  • Email Notifications: Send automated email notifications to both you and your clients for appointment confirmations, reminders, and cancellations.
  • Customizable Forms: Collect additional information from your clients using custom form fields. This can be useful for gathering details like contact information, preferences, or special requests.

Using Easy! Appointments

  1. Add Services: Define the services you offer, including their names, descriptions, durations, and prices.
  2. Set Working Hours: Specify your availability by setting working hours and break times. You can also define specific working days and holidays.
  3. Configure Booking Rules: Set rules for how many appointments can be booked in advance, the minimum notice period, and other booking restrictions.
  4. Customize Appearance: Personalize the look of your booking page by choosing colors, fonts, and other design elements.
  5. Embed Booking Page: Embed the booking page on your website or share the direct link with your clients.

By following these steps and taking advantage of the features offered by Easy! Appointments, you can simplify your appointment scheduling process and improve your overall business efficiency.

Unlocking the Power of Video: Explore 3 Unique Video Content Generators with 1Min.ai

In the digital age, content is king, and video content reigns supreme. As consumers increasingly gravitate towards visual storytelling, businesses must adapt their marketing strategies to stay competitive. With platforms like 1Min.ai leading the charge in video content generation, marketers can harness the power of video without breaking the bank or stretching their resources thin. This blog post delves into three distinctive video content generators offered by 1Min.ai and how they can revolutionize your marketing efforts.

Automated Video Summarization:
Transform Long-Form Content into Bite-Sized Insights

In today’s fast-paced world, attention spans are shorter than ever. Content creators seek innovative ways to communicate valuable information quickly and effectively. One standout feature of 1Min.ai’s subscription is its automated video summarization tool. This video content generator transforms long-form content—like webinars, podcasts, or articles—into short, engaging videos that highlight the essential points.

By distilling hours of content into minute-long summaries, marketers can efficiently convey key messages while capturing the viewer’s attention. For instance, imagine a company hosting an engaging webinar on industry trends. Instead of expecting potential customers to invest an hour into watching the entire session, marketers can utilize the video summarization tool to craft concise summaries. These bite-sized videos can be shared across social media platforms, newsletters, and websites, maximizing reach and engagement.

Moreover, this feature enhances content repurposing. A single piece of long-form content can be transformed into multiple video clips, excerpts, or highlight reels. Marketers can strategically employ these snippets in their campaigns, tailoring the call to action based on each platform’s audience (e.g., Facebook, Instagram, LinkedIn). Consequently, video content generator marketing becomes a versatile tool that allows businesses to maintain a consistent narrative while appealing to diverse demographics.

AI-Powered Social Media Clips:
Create a Buzz and Boost Engagement

In the realm of social media, visuals command attention. With 1Min.ai, marketers can generate AI-powered social media clips tailored for platforms like Instagram, TikTok, and Twitter. These short, dynamic video snippets serve as powerful tools for engaging audiences and driving traffic to websites or landing pages.

The AI-driven generator analyzes the content and automatically identifies key moments, turning them into eye-catching clips. For example, a fashion brand launching a new collection can utilize this feature to create tantalizing clips showcasing the latest outfits. These clips not only communicate the brand’s message but also align seamlessly with social media trends, such as challenges or hashtags that resonate with target audiences.

Creating buzz around a product or service has never been easier. Marketers can swiftly share these clips during peak activity hours, ensuring maximum visibility. Additionally, because these videos are highly shareable, they can go viral, extending brand reach beyond conventional limits. By investing in video content generator marketing, brands not only promote products but also foster a fertile ground for organic engagement and word-of-mouth marketing, both of which are invaluable in today’s competitive landscape.

Personalized Marketing Videos:
Enhance Customer Interaction

Personalization is the cornerstone of modern marketing. Consumers increasingly expect tailored experiences that resonate with their specific needs and preferences. 1Min.ai’s platform offers a unique video content generator that allows marketers to create personalized video messages for their audiences. This feature gives businesses the power to connect with customers on an individual level, enhancing engagement and loyalty.

Imagine a startup that wishes to follow up with leads after a trade show. Instead of sending standard email follow-ups, they can craft personalized video messages addressing each lead by name and mentioning specific points of interest discussed during their encounter. This personal touch dramatically increases the likelihood of a positive response, as customers feel valued and understood.

Moreover, personalized videos come in handy during customer onboarding processes. Companies can create onboarding videos tailored to different customer segments, helping them navigate the product or service effectively. By guiding customers through their journey with tailored insights, businesses can reduce churn rates and boost customer satisfaction. Ultimately, adopting personalized marketing videos as part of the video content generator marketing strategy not only builds trust but fosters lasting relationships between brands and consumers.

Conclusion: Seize the Moment
with 1Min.ai’s Video Content Generators

Embracing the video content generator marketing strategy through tools like 1Min.ai opens up a world of opportunities for businesses of all sizes. By leveraging automated video summarization, AI-powered social media clips, and personalized marketing videos, marketers can enhance outreach, foster engagement, and nurture customer relationships more effectively than ever before.

In this digital landscape, standing out requires creativity, efficiency, and a keen understanding of your audience. 1Min.ai provides marketers with the innovative tools to achieve these goals and transform their marketing efforts. Whether you’re aiming to turn lengthy content into digestible summaries, generate buzz on social media, or create one-of-a-kind personalized messages, these video generators equip you with the means to captivate and connect.

In conclusion, as you navigate the rapidly evolving world of digital marketing, consider integrating 1Min.ai’s tools into your strategy. The future of marketing is visual, personal, and engaging—don’t get left behind in this exciting new era!

Try 1Min.ai Right Now for FREE!

Installing A Second Hard Drive in a Linux Desktop

I wanted to install a 1TB SSD in my Ubuntu Linux computer in addition to the 512GB SSD I already had. I wondered when the 512 was full, would it just automatically add files to the new 1TB SSD? Here’s what I found out…

When you install a new 1TB SSD in addition to your existing 512GB SSD on your Ubuntu system, the system won’t automatically start adding files to the new drive when the 512GB SSD is full. By default, Ubuntu (and other Linux distributions) mounts each drive separately, meaning each drive functions as an independent storage device.

To set up automatic storage expansion across both drives, you have a few options:

1. Mount the new SSD and use it as a separate drive:

  • You can mount the 1TB SSD as a separate storage location. In this case, you’d manually store specific files on the new SSD. For example, you might use it to store media, backups, or other large files.
  • You’d need to create a mount point (e.g., /mnt/1tb_ssd) and manually move files or directories there.
  • When one drive is full, you’ll need to manually start storing files on the other.

2. Extend storage with Logical Volume Management (LVM):

  • Using LVM, you can combine the two SSDs into a single logical volume, so the system treats them as a single storage pool. When the 512GB SSD is full, files will automatically start being stored on the 1TB SSD.
  • However, this setup may require repartitioning and backing up data, as LVM operates on entire partitions.

3. Mount the new SSD to a specific directory:

  • Another approach is to mount the 1TB SSD to a specific directory (e.g., /home/user/Documents or /var/lib). This allows you to seamlessly expand the storage of a specific folder without combining the drives completely like LVM.

Example Setup for Manual Mounting:

  1. Install the new 1TB SSD and ensure it’s recognized by the system.
  2. Format the SSD (e.g., using ext4).
  3. Create a mount point (e.g., /mnt/1tb_ssd).
    sudo mkdir /mnt/1tb_ssd
    
  4. Mount the new SSD:
    sudo mount /dev/sdX1 /mnt/1tb_ssd
    

    (Replace /dev/sdX1 with the actual device path for your new SSD).

  5. Add it to /etc/fstab to automatically mount on boot:
    sudo nano /etc/fstab
    

    Add the line:

    /dev/sdX1   /mnt/1tb_ssd  ext4  defaults  0  2
    

This method requires you to consciously choose which drive to save files on, but it’s simple and doesn’t involve complex configurations like LVM.

I used Rescuezilla to clone the 512GB SSD and then re-install the OS on the new 1TB drive. Then it was mounted, and a new entry was added to the fstab file using Nano as described above.